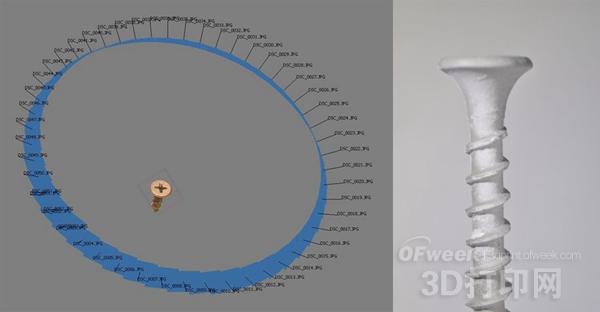
Can you create a desktop 3D scanner with unlimited resolution for only $50? The great god Whitney Potter on Instructables did this. He used only a Nikon SLR camera and an Arduino-driven stepper motor. To capture high-resolution scan results, Potter's system uses photogrammetry—a method of creating 3D images from a set of partially overlapping 2D photos. This impressive result may only be believed if you see it with your own eyes.
Of course, the premise of this "$50 3D scanner" is that you must have a SLR camera first, because you must have a high-quality digital camera to build this 3D scanner. And this SLR can not be included in the $50 budget. Once this small condition is met, the other links will not cost much. Potter's idea is simple: If you have a good quality digital camera with the right operation, you can buy a dedicated 3D scanner.
The main obstacles that may be encountered in photogrammetry are photo quality and spacing. Each photo must be perfectly focused and exposed, and captured around the object to capture every detail. And there must be enough overlap so that the rendering software knows where each shot is. You should maintain the correct spacing when actually scanning some large objects. But the real difficulty is scanning small objects, which is why Potter introduced stepper motors driven by Arduino.
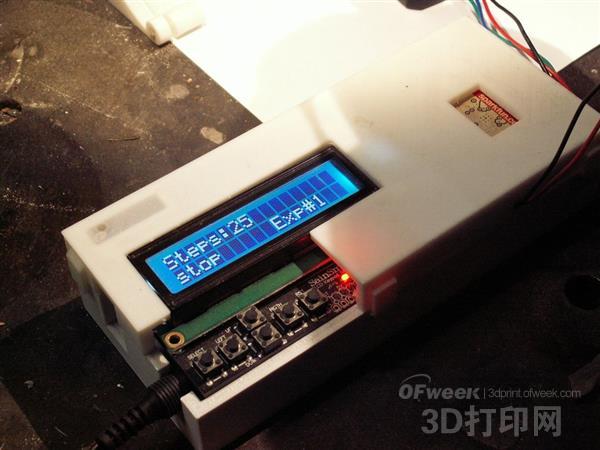
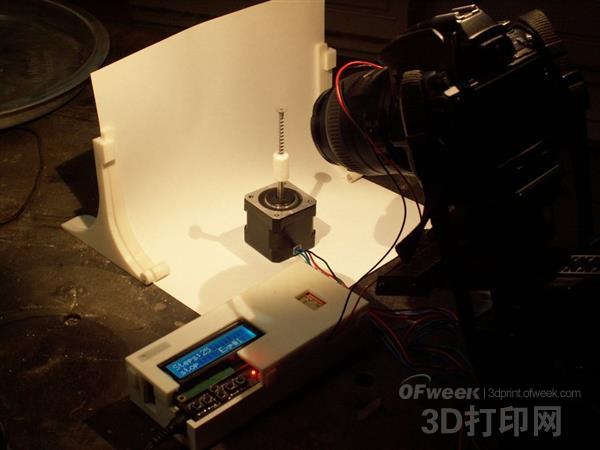
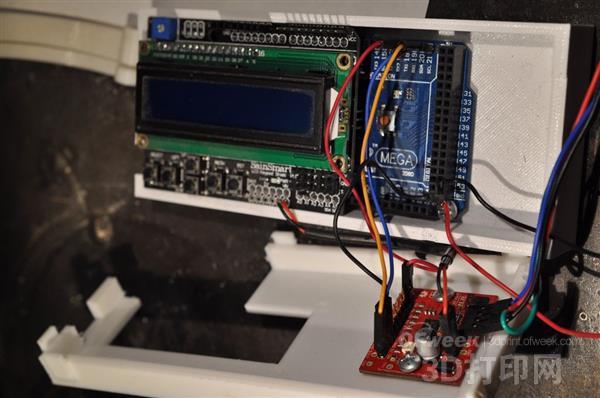
The DIY 3D scanner uses a stepper motor controlled by an Arduino board to rotate the object to be scanned, then triggers the camera's wireless sensor with the LED to activate the shutter. This process is repeated until all angles of the object are captured, and a photogrammetric software is used to construct a precise and high resolution 3D image of the object. In summary, this DIY 3D scanner requires only five key components: Arduino, stepper motor driver, stepper motor, infrared LED and LCD expansion board.
Although Potter's Arduino code assumes that a Nikon digital SLR camera can be used, other brands of SLRs can be used, you only need to change the corresponding code. In addition, he uses Sebastian Setz's multi-camera infrared control library, so the scanner supports almost any brand of camera with infrared remote control. When there is no problem with the code, you also need to pay attention to the full illumination when shooting to ensure that the camera can capture all the exact details. As for photogrammetry software for photo processing, Potter recommends using Agisoft Photoscan ($180), Autodesk Memento, or Autodesk 123D Catch. Click here to view Potter's shared production tutorial
Safe Function: The UV sanitize lamp with Volatile ozone can kill up to 99.9% of most viruses, airborne bacteria, and mold spores.Uses UVC sterilizer light, 360 ° degrees wide beam angle.Made of quartz material, long service life, high transmission rate, and better sterilization effect.
Use safety: It can be operated remotely through doors, walls, cabinets, etc. There is no limit on the angle, and you do not need to worry about being injured by ultraviolet radiation during operation. Use method 1: panel operation Use method 2: remote operation.
Applicable places:UV Disinfection Lamp can safely used in homes, as well as in hospitals, laboratories, malls, doctors″ offices, commercial buildings, food processing plants and other commercial and residential environments throughout the world - any big area place a concern for clean air exists.
Important :Exposing the Ultraviolet radiation for a long time will cause skin and eye burns, please pay attention to the Use instruction manual.People,pet animals and plants are Not Allowed to be present when the UV lamp lighting to work. Please leave away from the place of use immediately. To avoid damage to the skin and eyes, please DO NOT Stare at the ultraviolet light source
Uv Disinfection light,sterilizing UV Light,Germicidal lamp,UV lamp,disinfection lamp
Shenzhen Lanejoy Technology Co.,LTD , https://www.szcoolingrack.com